✳️ 첨부 파일은 Visual Studio 2017 프로젝트 파일입니다.
Python으로 제작한 프로그램을 Windows Service로 만드는 가장 확실한 방법 입니다.
준비물 :
1. nssm : https://nssm.cc/download
NSSM - the Non-Sucking Service Manager
NSSM - the Non-Sucking Service Manager Windows 10, Server 2016 and newer 2017-04-26: Users of Windows 10 Creators Update or newer should use prelease build 2.24-101 or any newer build to avoid an issue with services failing to start. If for some reason you
nssm.cc
➔ 테스트 Project 파일과 함께 첨부해 놓았으나 최신 버전이 필요하시면 위 링크에서 다운로드 하시면 됩니다.
Service 등록 절차
✔️ Python 예제 프로그램
#_*_ coding: utf-8 _*_
import os
import sys
import time
import logging
from datetime import datetime, timedelta
def init():
current_directory = os.path.dirname(os.path.realpath(__file__)) # .py 파일 위치
current_log_directory = os.path.join(current_directory, "Log") # 생성할 로그 폴더
try:
if not os.path.exists(current_log_directory): # 로그 폴더 존재여부 검사
os.makedirs(current_log_directory) # 폴더 생성
except OSError:
print('----------------- Error -----------------')
return -1
# 로그파일 설정
now_date_str = datetime.now().strftime('%Y%m%d_%H%M%S') # 현재 시간을 파일명으로 사용
errorlogfilename = os.path.join(current_log_directory , "Log_%s.log" % (now_date_str)) # 로그파일의 전체 경로
# 로그파일 생성
logging.basicConfig(
filename=errorlogfilename,
level=logging.DEBUG,
format='[%(asctime)s][%(name)s][%(levelname)s] - %(message)s'
)
return 1
def main():
# 1초마다 로그파일에 현재 시간을 기록
for i in range(10):
out_message = "Now Time : %s" % (datetime.now().strftime('%Y-%m-%d_%H:%M:%S'))
logging.info("Now Time : %s" % (out_message))
print("Now Time : %s" % (out_message))
time.sleep(1)
return
if __name__ == '__main__':
if (init() >= 1):
while True:
main()
time.sleep(10) # 10초마다 main() 함수 실행
else:
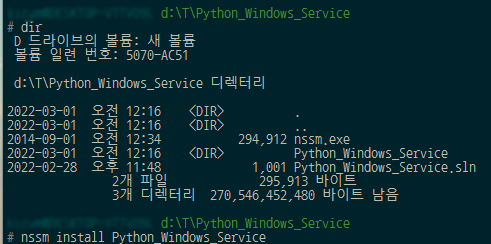
print("Exit")✔️ 관리자 권한으로 CMD를 실행하여 nssm이 보관된 폴더로 이동합니다.
✔️ nssm install [서비스명]을 입력합니다.
✔️ Path : Python 실행파일을 선택합니다. (Startup directory는 자동으로 채워집니다.)
ex) C:\Users\kirum\AppData\Local\Programs\Python\Python39\python.exe
✔️ Arguments : xxxx.py 파일을 전체 경로를 입력합니다.
ex) D:\T\Python_Windows_Service\Python_Windows_Service\Python_Windows_Service.py

✔️ Install service 클릭

✔️ 정상적으로 Service가 등록되었으며 시작/중지 모두 정상적으로 작동합니다.

'Python' 카테고리의 다른 글
| Python 모듈 Offline 설치 (폐쇄망 모듈 설치) (0) | 2022.07.15 |
|---|---|
| [파이썬] 주식 정보 수집시 사용한 파이썬 코드 공유 (5) | 2018.03.13 |
| Python 으로 Excel 파일을 DB에 저장 (0) | 2017.11.03 |
| Python 으로 CSV 파일을 DB에 저장 (0) | 2017.11.02 |
 Stock_Crawling 2.7z